Elegance Scrap Tag Tutorial
By KMLDesignz08
Written September 14th 2008
Supplies Needed For This Tutorial
Images of choice (need 4)
Images of choice (need 4)
Font Of Choice.
DSB Flux Plugin (optional)
Mask of choice or the one I provided
Frame of choice or the one I supplied.
Frame is from Designs By Ali
Scrap kit of choice or the one I supplied
Scrap Kit is from Sophisticated Scraps By Lisa
http://sophisticatedscraps.blogspot.com/
Plugin- Filter Factory J (optional)
Plugin- Filter Factory J (optional)
Supplies Here
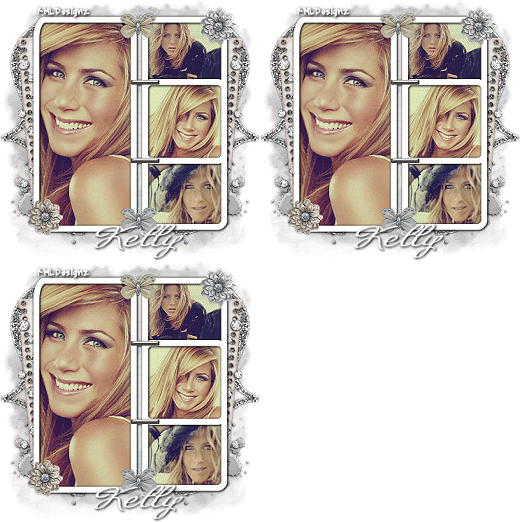
Here is what we will be making :)
Step 1
Open new image 600*400, we will resize later.
Open up the frame supplies or one of choice, copy and paste as a new layer on your new image.
Resize it by 70% smart size all layers NOT checked.
Take your magic wand set at 0 for tolerance and feather
click in side the long frame first, go to selections and click on expand and expand by 6
Take your first image of choice, paste as a new layer on your image. Depending on the size of your graphic, resize to your liking. Sharpen 3 times.
Go to selections, click invert and hit delete on your keyboard, then click invert again.
Drag your image below the frame layer.
Repeat those same steps for the remaining images you have left to fill the squares.
Merge all your images together, NOT the frame layer or raster 1.
Once you finish the other images, I used the filter factory J plugin for the toners with these settings
Red- 20 Green- 14 Blue- 44
After doing that 3 times to the images, give your frame a drop shadow
V&H- 1 Opacity-100 Blur-3.00 Color-Blk
Step 2
Decorating your tag.
Open up the SS - Elegance - Flower 1 paste as a new layer, make sure its on the top layer.
Resize this @ 20% smartsize, just once, sharpen once. Place this in the top right corner of the taggie.
Open up the SS - Elegance - Flower 2 and repeat the same thing as above but place this one in the lower left corner of the taggie. Now remember you can use a different flower from the kit, I just thought these ones looked best for my taggie.
Open up the SS - Elegance - Butterfly 1 and paste as a new layer on your image, resize this @ 20% smartsize just once, sharpen once and place in the middle of the taggie at the top.. Look at my taggie above for placement.
Open up the SS - Elegance - Butterfly 2 and repeat the same steps as the other one but place at the bottom of the taggie in the middle, look at my taggie above for placement.
Open up the SS - Elegance - Paper 3 and paste as a new layer, bring this on top of raster 1 and resize @ 70% smartsize twice, apply the mask I provided or one you picked, delete mask layer and click yes when the box comes up, then merge mask group. Duplicate this layer 3 times, then merge those 3 layers together.
Open up the af_TimelessAddon_Note paper and paste as a new layer on your image, resize this at 70% smartsize, all layers NOT checked, add a drop shadow like the one above for the frame. Rotate this @ 5 degrees to the left, and bring this on top of the mask layer and make it look like its peeking out some.
Open up the Diamonds tube and copy this on the image, resize @ 70 smartsize just once, sharpen once and place this on top of the notebook paper layer.
Open up the KC_glitterbracket_kimchristensen and erase one side of the bracket, the right side, and all the lines, I colored mine some to match better with the tag. Copy and paste on your image and resize @ 30% smartsize and rotate again @ 5 to the left once, sharpen once or to your liking, bring this below the notebook paper layer and have it peek out some.
Open up the treed-icandy-paintblack and copy and paste on your image as a new layer, resize this @ 70% twice and sharpen once, I colored it grey to match the taggie. Give the same drop shadow as before to this and bring above the mask layer.
Now close out these following layers, mask, bracket, splats, notebook paper and the diamonds and raster 1.
Give your flowers and butterflies the same drop shadow, Optional you don't have to. then merge all those layers together. Then close this layer you just merged, and open up the ones above, ACCEPT for the mask and raster 1 layers, as well as the diamond layer. Merge the notebook paper and bracket and splats together. Duplicate this layer, mirror. Open the Diamond layer, make sure its above the layer you just merged, duplicate the diamond layer, and mirror then merge both diamond layers together.
Now this is were you can either add your name and water mark info or you can continue for the animation part.
Step 3
Animation.
Go to plugins and find the DSB Flux plugin and choose Bright Noise and with the settings like this
Intensity- 61 Direction- Mix, Click mix twice, then apply
Merge visble the layers that are open. Resize tag @ 70% smartsize, all layers NOT Checked, sharpen once. Copy Merged and bring over to animation shop.
Copy and paste as a new image. Back to PSP and undo the steps right up to the bright noise, and repeat the bright noise but make sure you click mix twice again. Repeat other steps and paste into Animation after current frame, Repeat one more time for 3 frames in animation. Now the size of the frames in Animation, open a new one but with a white background same size as those frames, then select all of the tag, and paste on the white background.
Back to PSP and select font of choice and write out your name, drop shadow as before, and copy and paste into the animation as new image, then propagate paste is selected, and paste your name were you want. Add any watermark info and save your tag. And now we are done :) Thank you for trying my new tut, Hope you enjoyed it.


1 comments:
I subscribed! Thanks again for sharing your creativty and talent :)
Post a Comment