Saturday, April 30, 2011

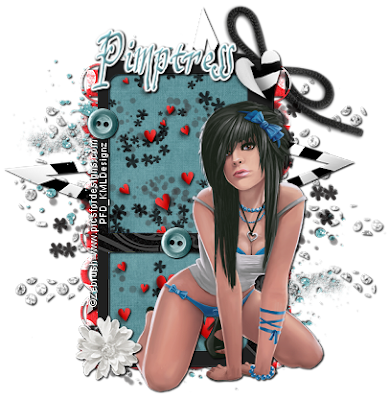
Shabby Little Me Tutorial


Shabby Little Me Tutorial
By KMLDesignz
April 30th 2011


Supplies Needed
Paint Shop Pro 9 (can be done in any version)
Tube of choice, The one I am using is a PTU one by Zebrush
http://picsfordesign.com/en/
You need a license to use them, you can get them here
Scrap kit of choice, I am using Shabby Little Me PTU kit by Pimpd Designz
http://pimp-your-tags.blogspot.com/
You can purchase that here and here
Font of choice, I am using is, sinisterSam
Filter Factory J Toners plugin (optional)


Let's get started

Open up your supplies you are going to use and minimize them in PSP for now

Open a new image 700*500, we will resize later.

Open up pd-frame-06, copy and paste as new layer, resize @ 70% smartsize twice, then
sharpen twice.

Open up pd-pp-10, resize twice, and sharpen once, copy and paste as a new layer, bring below your frame layer.
Using your magic wand, click inside your frame layer,back on your paper layer
invert and delete so the excess of the paper is gone.

Add a drop shadow to your frame layer
V&H-1
Opacity-100
Blur-2.00
Color-BLK

Open up your tube you are using, depending on your tube, resize to your liking so it
fits nicely on your tag, sharpen once or twice, add same drop shadow as before.

This is optional but I added filter factory J toners to my tube, with these settings
Red-10 Green-14 Blue-9

Time to decorate the tag.


Open up pd-flowers-01, copy and paste as a new layer, resize once @ 70% smartsize and sharpen once.

I brought this below the frame layer and made it peak out some, then duplicate it and flip
then mirror it and place it on the other side so it peaks out some as well. use my tag as a guide.

Add the same drop shadow as before to the flower layers.

Using the same flower we just did, I pasted them again and put them above the paper
layer and put them nicely in the frame, you will need to click inside the frame layers
with your magic wand, then back on the flower layer we just made, invert then delete the
excess that hangs over.

Open up pd-button-01, copy and paste as a new layer, resize this @ 50% smartsize twice.
Add the same drop shadow as before, duplicate it once and place them nicely on the tag.
You can use my tag as a guide or place were you like them.

Open up pd-flowers-03, copy and paste as new layer, resize @ 70% smartsize 3 times, sharpen twice.

I placed this one on the bottom left corner of the tag. Add same drop shadow as before.

Open up pd-print-02, copy and paste as a new layer, rotate to the right @ 90 degrees.
Resize this @ 70% smartsize twice, sharpen twice and add a inner bevel with these settings

Bevel-#2 width-5 smoothness-5 Depth-2 Ambience-2
Shininess-4 Angel-315 Intensity-50 Elevation- 30 and color is white

Duplicate this once and mirror it so it peaks out some on the other side, I put these below
the all the layers.

Open up pd-glitter-01, copy and paste as a new layer, resize @ 70% smartsize once, duplicate
once and mirror it and then flip it, I erased some that peaked out too far, use my tag as guide.

Add same drop shadow as before.

Open up pd-heart-01, copy and paste as a new layer, resize 3 times @ 70% smartsize and sharpen once.
Add same drop shadow as before, I place this in the top right of the tag.

Open up pd-glitter-02, copy and paste as new layer, resize once @ 70% smartsize and once @ 85%
smartsize and sharpen once and add same drop shadow as before, I placed this behind all layers.

Open up pd-string-01, copy and paste as new layer, resize twice @ 70% smartsize, sharpen once
and add same drop shadow as before, I placed this behind all layers and had it peak out some
on the top right of the tag like a bow.

Open up pd-heart-02, copy and paste as new layer, resize once @ 70% smartsize, sharpen once
and add same drop shadow as before, I put these below the frame layer like the flowers, duplicate one
and arrange them so they look nicely. Use my tag as a guide.

Open up pd-frame-02, copy and paste as a new layer, resize once @ 70% smartsize, sharpen and
add same drop shadow as before, I placed this behind all the layers and had it peak out. Use
my tag as a guide or place to your liking.

Open up your font of choice, add your name and any copy right info that belongs and your watermark.

Save as a png or jpeg and your done. I hope you enjoyed my tutorial!
Thursday, April 28, 2011

American Honey Tutorial


American Honey Tutorial
By KMLDesignz
April 28th 2011

Supplies Needed
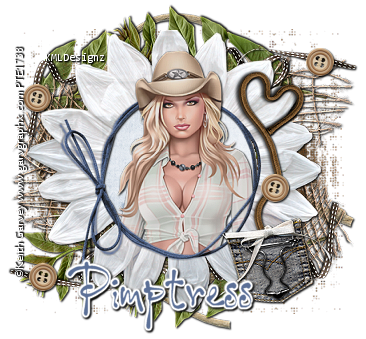
Tube Of Choice, the one I am using is PTU By Keith Garvey
www.garvgraphx.com
You need a license to use it and you can purchase here and here
http://psptubesemporium.com
Scrap kit of choice, I am using a PTU Scrap Kit, American Honey by Pimpd Designz
http://pimp-your-tags.blogspot.com/
You can purchase that here and here
Font of choice, I am using is, Salpicon
Filter Factory J Toners plugin (optional)


Lets get started

Open up a new image 700*500 we will resize later.

Open your tube of choice, minimize it for now.

Open up your scrap kit

Open up pd-frame-02, copy and paste as a new layer, resize twice @ 70% smartsize and sharpen twice

Duplicate the frame layer once, open up your minimized tube, copy and paste, resize to
your liking, depending on which tube you used, and sharpen, I then used the claify under
enhance photo, once with 5 and used filter factory J toners plugin with these settings

Red-11 Green-14 Blue-15, apply once or play around till you like it.

I then brought this below the duplicated layer of the frame and then erased some of the
frame that was covering the tube so it sits nicely in the frame.

Click inside your frame layer with your magic wand, expand by 5. Open up paper
of choice, I used pd-pp-08 from the kit, resize some and sharpen once, and invert then delete.

Bring that below the frame layer, I then added a drop shadow to the frame that we
didn't erase, with these settings
V&H- 1
Opacity-100
Blur- 2.00
Color- BLK

Let's decorate our taggie

Open up the pd-greens-02, copy and paste as new layer, I then rotated 90 degrees to the
left, resize @ 70% smartsize 3 times then sharpen 3 times, duplicate once and bring
it over some so it peaks out on the bottom of the left side.
I then duplicated it once more and flipped it, so it peaks out some on top right.
Duplicate once more and mirror it so it peaks out on the left, I erased the stem some
so it doesn't hang over, use my sample as a guide. bring below frame layer.
add same drop shadow as before.

Open up pd-mesh-01, copy and paste as a new layer, resize @ 70% smartsize twice and sharpen twice.
Duplicate once and flip it and mirror so it peaks out some on the bottom as well.
Bring these above the leaves layer but still below the frame layer.
add same drop shadow as before.

Open up pd-print-01, copy and paste as a new layer, resize @ 70% smartsize twice and sharpen once
then duplicate once and merge those two layers together, then duplicate again and flip it
so it peaks out some on the bottom, I brought these layers to the bottom behind everything.

Open up pd-ribbon-01, copy and paste as a new layer, resize @ 70% smartsize twice and sharpen
twice, add same drop shadow as before, duplicate once, and then mirror so it peaks out some on the
bottom, use my tag as a guide.


Open up pd-string-heart, copy and paste as a new layer, resize @ 70% smartsize 3 times, sharpen twice
add same drop shadow as before, and place on right side of the frame above all layers.

Open up pd-jean-01, copy and paste as a new layer, resize @ 70% smartsize 4 times and
sharpen 3 times, rotate this @ 15 degrees to the left before you sharpen, I put this
over the heart string layer so the heart looks tucked in.

Open up pd-twine-01, copy and paste as a new layer, resize @ 70% smartsize once then once @
85% and once @ 90%, sharpen twice and add same drop shadow as before.

Open up pd-buckle, copy and paste as new layer, resize @ 70% smartsize three times
and sharpen twice and add same drop shadow as before, and place this over the jean pocket.

Open up pd-button-01, copy and paste, resize @ 70% smartsize 4 times and sharpen once,
I place mine in random places on the tag, use my tag as a guide, add same drop shadow
as before.

Open up your font of choice and put your name on it, any copyright info that applies
and your watermark. Save as a png or jpeg, and your done!

Hope you enjoyed my tutorial!!

Another sample using the PTU of Suzanne Woolcott
©Suzanne Woolcott www.gorjussart.com


Saturday, April 9, 2011

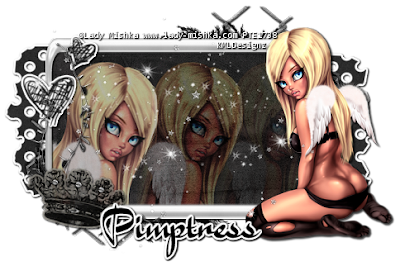
Lady Mishka Goth Angel Tutorial


Lady Mishka Goth Angel Tutorial
By KMLDesignz

Supplies Needed
Tubes of choice, one close up, one full body
The one I used is a PTU tube by Lady Mishka
http://www.lady-mishka.com/
You need a license to use it, which you can
purchase both here
http://psptubesemporium.com

Scrap kit of choice or the one I used
PTU kit Can't be Tamed by Pimpd Designz
http://pimp-your-tags.blogspot.com/
You can purchase that here and here
Font of choice, the one I used is Fabius

Lets get started

open 600*400 image, we will resize later

Open up pd-frame-06, copy and paste as a new layer
resize once @ 70% smartsize, I then used the deform tool and stretched
the frame so it would be wide in height some, use my tag as guide.
Sharpen once.

With your magic wand, click inside your frame, expand by 6
Open up pd-pp-09, copy and paste as new layer, resize this paper layer
@ 70% smartsize twice then sharpen twice. Invert, then delete and select none.

Add drop shadow to your frame
V&H-1
Opacity-100
Blur-2.00
Color-BLK

Open up your tube of choice, copy and paste as new layer
now depending which tube you are using, resize it down some to your liking.
Bring this below the frame layer, I then duplicated mine twice and moved them over
some so they are lined up nicely next to eachother, on the duplicated layers
switch the blend mode both to soft light, then on the last duplicate, bring the
opacity to 38 or play around till you like it, so it looks like it faded out.

On your original tube layer, bring the opacity to 66 or to your liking.

Open up your second tube (if your using one) the full body one.
Copy and paste as new layer and resize to your liking, and place on right
side of the frame. Sharpen once, add same drop shadow as before.

Time to decorate :)

Open up pd-hearts-01, copy and paste as new layer, resize @ 70% smartsize 5 times
bring to the top left corner of the tag, sharpen twice
I added a gradient glow of white with eye candy 4000, this is optional

Open up pd-fence-01, copy and paste as new layer, resize @ 70% smartsize 3 times
sharpen twice, add same drop shadow as before, place this behind all layers.
duplicate once and flip it then mirror and place it on the bottom left side
and have it poke out some, use my tag as a guide.

Open up pd-feather-01, copy and paste as new layer, bring this below all layers
and have it poke out some on the bottom left, then duplicate and flip then mirror
and have it poke out some on the top right, use my tag as a guide.

Open up pd-flora-01, copy and paste as new layer, resize 3 times @ 70% smartsize
mirror and place this on the left side of the tag, use my tag as a guide, sharpen twice
and add same drop shadow as before.

Open up pd-crown, copy and paste as new layer, resize 3 times @ 70% smartsize
sharpen twice, add same drop shadow as before, rotate 10 degrees to the right
and place in bottom right corner of tag. Use my tag as a guide or place were you like.

Open up pd-prints-03, copy and paste as new layer, resize @ 70% smartsize once
sharpen twice, I added a white gradient glow with eye candy 4000 again, this is optional,
add same drop shadow as before, place this behind all layers.

Open up pd-sparkle-01, copy and paste as new layer, resize 3 times @ 70% smartsize
sharpen twice, and place this layer on top, duplicate once and bring it over some then merge together,
I erased the parts that were on the face.

Open up your font of choice and add your name and any copyright info that belongs
Save as a png or jpg and your done!

Hope you enjoyed my tutorial :)