Friday, May 27, 2011

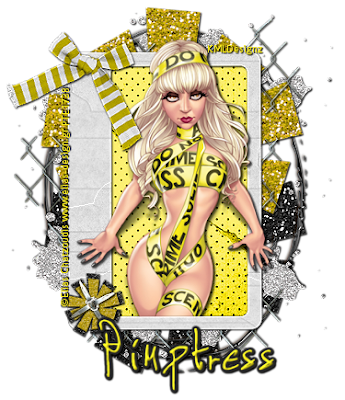
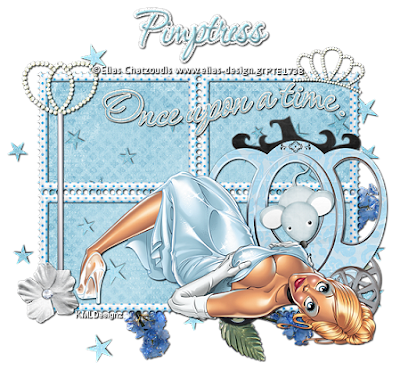
Cinderella Fairy Tale Tutorial


Cinderella Fairy Tale Tutorial
By KMLDesignz
May 27th 2011

Supplies Needed
Tube of Choice
I am using PTU Tube by Elias Chatzoudis
www.elias-design.grLink
You need a license to use it, you can get that here
Scrap kit of choice, I am using PTU kit Cinderella By Pimpd Designz
http://pimp-your-tags.blogspot.com/
You can get that here and here, comes in a set of all fairy tale princesses :)
Font of choice, I am using P22 Corinthia

Let's Get started

Open up your tube and set it aside for now.

Open up new image 700*500, we can resize later if we want.

Open up pd-frame-03, copy and paste as new layer, resize once @ 70% smartsize and
sharpen once, click inside all the squares with your magic wand, expand by 5.

Open up pd-pp-02, copy and paste as new layer, resize twice @ 70% smartsize
sharpen at least twice, and invert then delete and invert and select none.
Add a drop shadow to your frame layer, VH&-1 Opacity-100 Color-BLK Blur-2.00

Open up your tube and copy and paste as new layer, depending on which one your
using, resize nicely so it fits nice on the outside of the frame, helps if its
a laying down type tube, but any other is fine :) sharpen once or twice, add same
drop shadow to your tube layer.

Time to decorate the tag.

Open up pd-godmother-wand, copy and paste as new layer, resize @ 70% smartsize twice
and sharpen twice, add same drop shadow as before, place on the left side of the tag
above all layers.

Open up pd-flower-02, copy and paste as new layer, resize 3 times @ 70% smartsize
sharpen twice and add same drop shadow, Place over the wand we just did.

Open up pd-flower-01, copy and paste as new layer, resize once @ 70% smartsize and
sharpen once, place this behind all layers on the right side and have it peak out some,
add same drop shadow as before.

Open up pd-wa-01, copy and paste as new layer, resize @ 70% smartsize twice
and sharpen twice and add same drop shadow as before, place this on top of the
frame some, use sample as a guide.

Open up pd-tiara, copy and paste as new layer, resize @ 70% smartsize twice then
75% smartsize once and rotate 10 degrees to the right sharpen twice and add same
drop shadow as before, place on the top right of the tag on the frame. Above all layers.

Open up pd-star-01, copy and paste as new layer, resize @ 85% smartsize twice and
sharpen once, duplicate and flip it so it peaks out some, use sample as guide.
Add same drop shadow as before. Duplicate again and bring this above the paper
layer and erase any that hangs out. Bring the opacity of this layer to 66% or play with it.

Open up pd-carriage, copy and paste as new layer, resize @ 70% smartsize twice,
sharpen it twice and add same drop shadow, place behind your tube layer.

Open up pd-mouse, copy and paste as new layer, resize @ 70% smartsize three time
and sharpen once, add same drop shadow as before, place this inside the carriage
and make it peak out the window some, use sample as a guide.

Open your font of choice, add your name and any copy right info that belongs and
save as a png or jpeg and your done!

Hope you enjoyed my tutorial!!

Tuesday, May 24, 2011

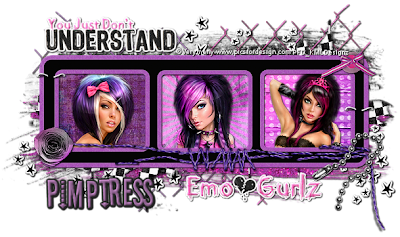
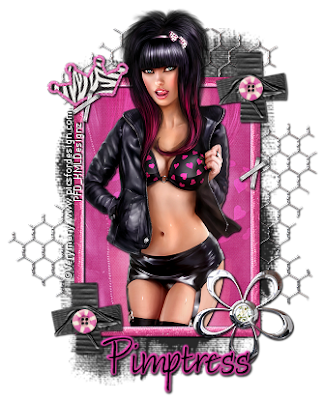
EMOlution Tutorial


EMOlution Tutorial
By KMLDesignz
May 24th 2011

Supplies needed
3 Tubes of choice
I am using PTU tubes by verymany
http://picsfordesign.com/en/
You need a license to use them which you can get here
Scrap kit of choice, I am using PTU by Pimpd Designz called EMOlution
http://pimp-your-tags.blogspot.com/
You can purchase that here and here
Word Arts of choice- the ones I am using are from PTU kit (optional)
Emo Girlz rock mix and match collab kit, you can purchase at same site above.
Font of choice, I am using Stereofidelic

Let's get started

Open up your tubes of choice and scrap kit, set them aside for now.

Open up a new image 700*500, we can resize later if we want.

Open up pd-frame-02, copy and paste as new layer, resize once @ 70% smartsize and sharpen once.

Click inside your first square with your magic wand, expand by 5

Open up pd-pp-08, copy and paste as new layer, resize 3 times @ 70% smartsize,
sharpen twice or to your liking. Bring this below the frame layer.
Repeat this step with 2 other papers or use the same, its up to you, I used
pd-pp-10 and pd-pp-11 for my other two squares.

Let's open up your tubes and pick your first one, depending on your tubes you are
using, resize them nicely, sharpen at least once or twice, add a drop shadow to the tube.
V&H-1 Opacity-100 blur-2.00 color-BLK, then erase any of the tube that hangs over the frame
so its just the head shot in the frame, see my sample as a guide. Repeat for other 2 tubes.

Add the same drop shadow to your frame as well.

Time to decorate your taggie to make it purrty :)

Open up pd-print-04, copy and paste as new layer, resize twice @ 70% smartsize and
sharpen twice, add an inner bevel to this layer with these settings
Bevel-2 width-5 smoothness-5 depth-2 ambience-2 shininess-4 color-white angle-315
intensity-50 elevation-30 then add same drop shadow as before. Place bottom left of tag.
Duplicate this layer and flip it, then place on the right top of the tag, place
both of these behind all the layers so they peak out. use sample as guide.

Open up pd-stitch-03, copy and paste as new layer, resize once @ 95% smartsize,
sharpen twice and add same drop shadow as before, I place this on the bottom of the frame.

Open up pd-staple, copy and paste as new layer, resize twice @ 70% smartsize
sharpen twice and add same drop shadow as before, I placed one on the top of the frame
on the left and then duplicated and placed on the middle right of the frame.

Open up pd-stars-01, copy and paste as new layer behind all layers, leave as is.
I added a gradient glow of white to mine with eye candy 4000 this is optional, if
you do, add a drop shadow after and duplicate once then merge those two together.

Open up pd-flower-02, copy and paste as new layer, resize 3 times @ 70% smartsize
and sharpen twice, add same drop shadow as before. I placed this on left bottom of frame.

Open up pd-glitter-02, copy and paste as new layer, leave as is and add same drop shadow.
Add to bottom of tag behind all layers.
Repeat this for the pd-glitter-03 and place on the top behind all layers.

Open up pd-fence-01, copy and paste as new layer, resize twice @ 70% smartsize
sharpen twice, and mirror it once, add same drop shadow as before, repeat this with
pd-fence-02 and put on the other size, use sample as guide.

Open up pd-chain-01, copy and paste, resize 3 times @ 70% smartsize, sharpen twice
and add same drop shadow as before, place on the bottom right of the frame, on top of all layers.

Open up pd-button-01, copy and paste as new layer, resize 4 times @ 70% smartsize
sharpen twice and add same drop shadow, place this on top right of the tag on the frame, on top of all layers.

Open up your word arts if any and apply them to the tag.

Open up your font of choice, add your name and any copyright info that belongs.
Save as a png or jpeg and your done!

Hope you enjoyed my new tutorial.

Wednesday, May 18, 2011

Glamour Punk Rock Tutorial


Glamour Punk Rock Tutorial
By KMLDesignz
May 18th 2011

Supplies needed
Tube of choice, I am using a PTU by Verymany
http://picsfordesign.com/en/
You need a license to use it which you can purchase here
Scrap kit of choice, I am using PTU Punk Rock by Pimpd Designz
http://pimp-your-tags.blogspot.com/
You can purchase that here and here
Font of choice, I am using Wet Dream

Let's get started

Open up your supplies, minimize your tube for now.

Open up a new image 700*500, we will resize later.

Open up pd-frame-02, copy and paste as new layer, resize twice @ 70% smartsize sharpen twice.

Open up your tube of choice, depending which tube you are using, resize to your liking,
sharpen at least twice, place it nicely on the frame, duplicate the frame bring one
above the tube layer an erase any that covers the tube.

Add a drop shadow to the original frame layer, NOT the duplicated one.
V&H-1
Opacity-100
Blur-2.00
Color-BLK
Add the same drop shadow to your tube as well.

Open up pd-pp-01, copy and paste as new layer, click inside your frame layer with
your magic wand, expand by 5, resize the paper twice @ 70% smartsize sharpen twice.
Invert, delete the excess, invert then select none.

Lets decorate the taggie :)

Open up pd-letter-splat, copy and paste as new layer, resize once @ 70% smartsize and once
@ 85% smartsize, sharpen twice, add same drop shadow as before, duplicate once,
resize @ 80% smartsize and sharpen once, place these behind all layers. The duplicated
one I place on the bottom right of the tag, use sample as guide.

Open up pd-fence, copy and paste as new layer, resize twice @ 70% smartsize
sharpen twice and add same drop shadow as before, place this above the splat.

Open up pd-tape-01, copy and paste as new layer, resize 3 times @ 70% smartsize,
sharpen twice and add same drop shadow as before, I place this on top of the frame
in the bottom right of the tag. Place were you like or as I did.

Open up pd-ribbon-01, copy and paste as new layer, resize 3 times @ 70% smartsize,
sharpen once, add same drop shadow as before, I place this in top left of the taggie.

Open up pd-swirl-02, copy and paste as new layer, resize 4 times @ 70% smartsize,
sharpen once and add same drop shadow, place this below the tape layer on the right
or to your liking, use sample as guide or go your own way.

Open up pd-spikes-01, copy and paste as new layer, resize twice @ 70% smartsize
sharpen twice, add same drop shadow as before, I place this on top of the frame
layers bottom part of the tag and erased any that hung over, use my sample as guide.
Duplicate it and place one on the top of the frame as well.

Open up pd-kiss-pin, copy and paste as new layer, resize 4 times @70% smartsize
sharpen twice, and rotate 10 degrees to the left and place on top left of the taggie.

Open up pd-charm-01, copy and paste as new layer, resize 3 times @ 70% smartsize,
sharpen twice and place below the kiss pin and add same drop shadow as before.

Open up pd-print-03, copy and paste as new layer, resize twice @ 70% smartsize,
sharpen once and duplicate then merge them together, duplicate once more and
then flip it and place on the top of the tag, put both behind all layers, use
sample as guide so they peak out nicely.

Open up your font of choice, add your name and any copy right info that belongs.
Save as a png or jpeg, and your done :)

Hope you enjoyed my tutorial.

Tuesday, May 17, 2011

Go GaGa Tutorial


Go GaGa Tutorial
KMLDesignz
May 16th 2011

Supplies Needed
Tube of choice
I am using a PTU tube by Elias Chatzoudis
www.elias-design.gr
You need a license to use it which you can get here
Scrap kit of choice, I am using PTU kit Go GaGa by Pimpd Designz
http://pimp-your-tags.blogspot.com/
You can purchase that here and here
Font of choice, I am using is Detailles

Let's get started

Open a new image 700*500 we will resize later.

Open up your tube and kit, minimize your tube for later.

Open up pd-frame-01, copy and paste, resize @ 70% smartsize once, then once @ 85% smartsize
rotate 90 degrees to the right, resize once more @ 85% smartsize, sharpen once.

Click inside your frame with your magic wand, expand by 5

Open up pd-pp-05, copy and paste as new layer, I colored mine to match the tube I am using.
You can do this as well or skip it. Resize @ 70% smartsize twice, sharpen twice.
Invert, then delete the excess paper, invert then select none.

Open up your tube of choice, copy and paste as new layer, depending which tube you are using
resize this nicely. Sharpen at least once or twice, which ever looks nice.

Duplicate your frame layer and bring this above your tube layer, erase any of it that covers
the tube so the tube sits nicely in the frame.

Add a drop shadow to your tube layer
V&H-1
Opacity-100
Color-BLK
Blur-2.00
I did it twice to my tube, you can as well or which ever looks best
Add this same drop shadow to your original frame layer NOT the duplicate one.

Time to decorate the taggie :)

Open up pd-fence, copy and paste as new layer, resize twice @ 70% smartsize then once @ 85% smartsize
sharpen twice and add same drop shadow as before. I placed this behind all layers.
Duplicate once and flip it so it peaks out on the bottom as well, use my tag as guide.

Open up pd-burst-01, copy and paste as new layer, resize twice @ 70% smartsize
sharpen once, add same drop shadow, I place this behind all layers.

Open up pd-burst-02, copy and paste as new layer, resize twice @ 70% smartsize
sharpen twice, add same drop shadow as before, place this behind all layers.

Open up pd-frame-02, copy and paste as new layer, rotate this @ 90 degrees to
the right, resize once @ 70% smartsize, sharpen twice, add same drop shadow.
I placed mine between the yellow and black bursts. Use my sample as a guide.

Open up pd-burst-02, copy and paste as new layer, resize five times @ 70% smartsize
Sharpen twice and add same drop shadow as before, I placed this on bottom of the tag
on the frame.

Open up pd-burst-01 and do the same as we just did for the black one but make it
smaller so it fits nicely on the black one. Use my sample as a guide.

Open up pd-brad-01, copy and paste as a new layer, resize three times @ 70% smartsize
sharpen twice, duplicate and rotate 90 degrees to the right, merge together and
place on the bottom corner of the frame and on top of the bursts, use my sample as a guide.

Open up pd-glitter-01, copy and paste as new layer, resize twice @ 70% smartsize
sharpen twice and add same drop shadow as before, duplicate once and flip it,
I placed these behind the yellow burst (big one), use sample as a guide.

Open up pd-ribbon-03, copy and paste as new layer, resize three times @ 70% smartsize
sharpen twice and add same drop shadow as before, rotate 10 degrees to the right and
sharpen again, then place on the top left of the tag.

Choose your font and add your name and any copyright info that belongs and save as a
png or jpeg and your done :)

Hope you enjoyed my tutorial!!

Monday, May 9, 2011

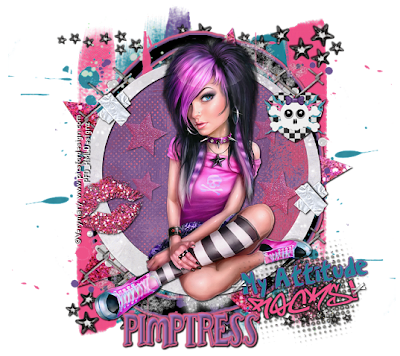
Emo Attitude Scraps Tutorial


Emo Attitude Scraps Tutorial
KMLDesignz
May 9th 2011

Supplies needed
Paint Shop Pro 9, can be done in other versions.
Tube of choice, I am using a PTU one by Verymany
http://picsfordesign.com/en/
You need a license to use them, you can purchase here
Scrap kit of choice, I am using PTU scrap kit, Attitude II by Pimpd Designz
http://pimp-your-tags.blogspot.com/
You can purchase that here and here
Font of choice, I am using is Lushus

Open up your supplies and minimize for now.

Let's get started.

Open up a new image 700*500, we can resize later

Open up pd-frame-03, copy and paste as a new layer, resize twice @ 70% smartsize
and sharpen once.
Click inside the frame with your magic wand, expand by 5

Open up pd-pp-03, copy and paste as new layer, resize twice @ 70% smartsize
and once @ 85% smartsize, sharpen twice, invert, delete, then select none.
Bring this layer below your frame layer.
Add a drop shadow to your frame layer
V&H-1
Opacity-100
Blur-2.00
Color-BLK

Open up your tube of choice and depending which tube you are using, resize nicely,
so it fits nicely in front of the frame, under enchance photo, click claify and
add it to the tube layer with the settings at 5.
(this is optional) Add same drop shadow to the tube as we used before.

Time to decorate the taggie :)

Open up pd-glitter-01, copy and paste as new layer, resize twice @ 70% smartsize, sharpen
once, I erased the dots that were on the outside of the glitter, I placed this on
the bottom left of the taggie behind all layers, duplicate once, then flip and mirror.
Add drop shadow
V&H- 1
Opacity-28
Blur-2.00
Color-BLK

Open up pd-fence, copy and paste as new layer, resize twice @ 70% smartsize
sharpen once, add same drop shadow as we did to the frame and tube.
Duplicate once and flip then mirror, place these so they peak out nicely on the tag.
You can use my sample as a guide or place to your liking. These are above the glitter.

Open up pd-kiss-01, copy and paste as new layer, resize 4 times @ 70% smartsize
sharpen twice and add same drop shadow as we did to the frame. I place this on the
left side of the tag, place there or to your liking.

Open up pd-print-01, copy and paste as new layer, resize once @ 70% smartsize.
Place this behind all the layers. Duplicate once, flip and mirror.

Open up pd-tape, copy and paste as new layer, resize 6 times @ 70% smartsize.
Rotate to the right @ 50 degrees, all layers NOT checked, sharpen twice, add
same drop shadow as before, then duplicate, and rotate @ 90 degrees to the left
so it makes and X pattern with the tape. Duplicate and place on the other side.
Use my sample as a guide.

Open up pd-skull-heart, copy and paste as new layer, resize 5 times @ 70% smartsize
sharpen once and add same drop shadow as before, I placed this on top right side of the tag
you sample as guide or place as you like.

Open up pd-wa-02, copy and paste as new layer, resize 3 times @ 70% smartsize
Rotate to the left @ 10 degrees, sharpen twice. Add the following drop shadow
V&H-1
Opacity-39
Blur-2.00
Color-BLK

Duplicate once and merge these layers together.

Open up pd-staple, copy and paste as new layer, resize 4 time @ 70% smartsize, sharpen once
duplicate once, and rotate to the left @ 40 degrees, merge together,sharpen once.
Add same drop shadow as we did for the word art. place this on the wordart like
its holding, use my sample as a guide. Duplicate and place on other side of word art.
Use my tag as a guide.

Open up pd-stars-03, copy and paste as new layer, bring this below all layers and
leave as is. Add same drop shadow as we did for the frame.

Copy and paste the same star, resize once @ 15% smartsize and sharpen once.
Change the opacity to 50, then duplicate once, place these around the frame on the
paper, then duplicate once more and resize @ 70% smartsize and duplicate again,
and place around like the bigger ones, use my tag as a guide.
Bring these all below the frame layer but above the paper layer.

Open up pd-doodle-01, copy and paste as new layer, resize once @ 70% smartsize,
bring this below all the layers.
Add a gradient glow with the color purple from the paper layer then with the pink color from the paper
add another one, and add same drop shadow as before with the frame layer,
I used Eye candy 4000 for the gradient glow.

Open up pd-print-04, copy and paste as new layer, resize @ 70% smartsize once,
rotate @ 90 degrees to the left, resize once more @ 85% smartsize, sharpen once
duplicate, merge together then duplicate again and mirror then flip, then merge
together again and bring this layer below all layers.

Open up pd-stars-01, copy and paste as new layer, resize twice @ 70% smartsize
sharpen once, place near bottom or the tag, Add same drop shadow as the frame
duplicate, flip and then mirror so its on top of the tag as well.


Open up your font of choice, add your name and any copyright info that belongs and
your watermark, save as a png or jpeg and your done! :)

Hope you enjoyed my tutorial.

Sunday, May 1, 2011

Wild Child Tutorial


Wild Child Tutorial
KMLDesignz
May 1rst 2011

Supplies Needed
Paint Shop Pro 9 or any other version will work.
Tube of Choice, I am using PTU work by Verymany
http://picsfordesign.com/en/
You need a license to use them, you can purchase here
Scrap kit of choice, I am using PTU kit Wild Child by Pimpd Designz
http://pimp-your-tags.blogspot.com/
You can purchase that here and here
Font of choice, I am using Alana

Lets get started

Open up your supplies you are using and minimize them for now in PSP

Open up a new image 700*500, we will resize later.

Open up pd-frame-01, copy and paste as a new layer, resize this @ 70% smartsize twice
and sharpen twice.
Click inside your frame with your magic wand, expand by 5.

Open up pd-pp-11, copy and paste as a new layer, resize down some to your liking. Make sure you sharpen it too.
Click on invert and delete the excess that hangs over the frame, select none.

Add a drop shadow to your frame
V&H-1
Opacity-100
Blur-2.00
Color- BLK

Open up your tube of choice, copy and paste as a new layer, depending on the tube you used, resize
to your liking, and sharpen at least once or twice, add same drop shadow as before.
Duplicate your frame layer and bring this above the tube layer and erase any that covers the tube that shouldn't.

I then clicked inside my frame again with the magic wand and expanded by 5
and took my same tube and pasted once more and select part of it and put it in the frame.
Invert and delete the excess of it, I then place this above the paper layer,
change your blend mode to overlay and play with the opacity a little to your liking.

Time to decorate the taggie.

Open up pd-print-01, copy and paste, resize once @ 80% smartsize and once @ 90% smartsize
Duplicate once, flip it, mirror it and then flip again. Bring below all layers.

Open up pd-tape-01, copy and paste as a new layer, resize twice @ 70% smartsize, sharpen once.
I duplicated once and place them on the frame, use my tag as a guide, or place were you like.
Add same drop shadow as before.


Open up pd-flower-04, copy and paste as new layer, resize 3 times @ 70% smartsize, sharpen twice.
Add same drop shadow as before and place on bottom right corner of the frame/tag or to your liking.

Open up pd-fence, copy and paste as a new layer, resize twice @ 70% smartsize, sharpen twice
Add same drop shadow as before, duplicate once and mirror, then flip it so it peaks out some.
I placed these above paint splat layer.

Open up pd-star-02, copy and paste as new layer, resize 4 times @ 70% smartsize, sharpen twice.
Add same drop shadow as before, duplicate this twice and merge them together.
I placed this one the top left of the taggie.

Open up pd-staple-01, copy and paste as new layer, resize 3 times @ 70% smartsize, sharpen twice.
Add same drop shadow as before, place this on the star layer like its holding it.
Duplicate once and place other one on the other side of the frame, use my tag as a guide, or place as you like.

Open up pd-button-03, copy and paste as new layer, resize 5 times @ 70% smartsize, sharpen once.
Add same drop shadow as before, I placed mine on the tape layer, then duplicated once and placed on the other tape.

Open up your font of choice, add your name and any copyright info that belongs.
Save as a png or jpeg, and your done!

I hope you enjoyed my tutorial.

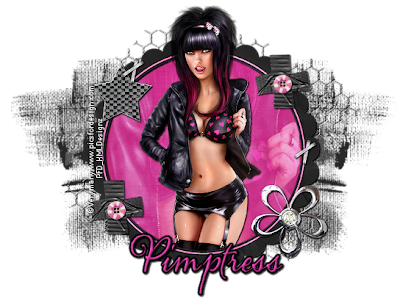
Here is another sample just different frame but can be done the same way.