Friday, October 21, 2011

Seduced By Hollywood Tutorial


Seduced By Hollywood Tutorial
October 19th 2011
By: KMLDesignz

Supplies Needed:
PSP, any version should work, I am using PSP 9
Tube of choice, I am using the awesome work from Marco Guaglione, this was a limited edition tube but you can purchase his art @ PTE here
Scrap kit of choice, I am using a PTU kit from Pimpd Designz called Hollywood
You can purchase this @ PMTWS here and here
Font of choice, I am using PlumeroScript

Let’s Get Started:
Open up your psp and supplies, minimize for now and open a new image 700*500, we will resize later if needed.

Open up a film strip frame of choice, I am using the one in the kit I have, C/P as new layer, rotate this 10 degrees to the right, then resize this @ 80% smartsize 3 times, sharpen twice, now with your magic wand, click inside each frame, then expand by 5, open up a paper of choice from your kit, I am using paper 9 from the kit, C/P as new layer and resize 4 times @ 80% smartsize, sharpen 3 times, click invert, then delete the rest that hangs over, invert again then select none, bring this below your frame layer. Add a drop shadow to your frame layer, V&H-1 Opacity-100 Blur-2 Color-BLK.

Open up another frame of choice, a circle one will do best, I am using the silver circle frame in the kit I have, C/P as new layer, resize 3 times @ 80% smartsize and sharpen twice, place this behind your film strip frame some and adjust it so its in the middle. Open up another paper of choice, I did paper 11, C/P as new layer and resize some @ 80% smartsize, sharpen three times and erase any that hangs over, I then picked another paper, paper 6, and did the same as I just did but then I changed the blend mode to Hardlight and lowered the opacity some so it looks blended in. I put it @ 82, you can play with it.

Open up your tube of choice, pick some parts of your tube to put inside the film strip frame, with different parts in each, resize nicely and sharpen at least twice, erase any that hangs over, once done I changed each layer of the tube to a different blend mode, the top, is Overlay, the middle is Luminance Legacy, and the last one is Hardlight, You can play around with them and pick which you like. Then take your main tube and C/P as new layer again, resize once @ 80% smartsize, sharpen once and add same drop shadow as before, place above all layers, add the same drop shadow to the other frame and tube layers.

Let’s Decorate The Taggie:

Open up a film reel of choice, I am using the film reel 1 from the kit, C/P as new layer, resize twice @ 80% smartsize and sharpen twice, same drop shadow as before, bring this below your circle frame and above the paper layers in that one.

Open up a sparkle of choice, I am using the one in the kit I have, C/P as new layer, I resized this @ 80% smartsize twice and sharpen it twice, add same drop shadow, I put this in the circle frame, above the paper and film reel, erase any that hangs over.

Open up a ribbon of choice, I am using ribbon 1 from the kit, C/P as new layer, rotate 90 degrees to the left so it face upright if it doesn’t, resize this 3 times @ 80% smartsize and sharpen 3 times, same drop shadow as before, I placed this on the first film strip frame.

Open up another ribbon of choice, this time I am using ribbon 4 from the kit, C/P as new layer, resize this one 2 times @ 80% smartsize and sharpen twice, same drop shadow as before, I placed at the bottom of the tag above all layers but the main tube layer.

Open up a pair of sunglasses of choice, I am using the ones in the kit I have, C/P as new layer, rotate 10 degrees to the left, resize these @ 80% smartsize 7 times, sharpen 3 times, I placed this one the first ribbon we did. Same drop shadow as before.

Open up a martini glass of choice, I am using the one in the kit, C/P as new layer, resize this @ 80% smartsize 4 times and sharpen 3 times, same drop shadow as before, place this above all layers on the left side of the tag some.

Open up a print splat of choice, I am using print 2 from the kit I have, C/P as new layer, resize this @ 80% smartsize twice and sharpen twice, same drop shadow as before, duplicate and then flip and mirror, place both of these behind all layers, having them peek out some on top and bottom, use sample as guide to place them.

Open up a word art of choice, I am using word art 5 from the kit, C/P as new layer, now depending on which one your using, resize nicely to fit on the tag, I placed mine near the martini glass above it, so it looks like the glass is sitting in the middle of the words. I also added a gradient glow to mine, this is optional for you to do if you want. Add same drop shadow as before.

Open up your font of choice and add your name to the tag and any gradient glow and the correct copyright info that belongs and save as a png or jpg and you are done with the tut!

Thank you so much for trying my new tut, I hope you enjoyed it!

Wednesday, October 19, 2011

A Witch’s Special Brew Tutorial


A Witch’s Special Brew Tutorial
October 9th 2011
By: KMLDesignz

Supplies Needed:
PSP, any version will do, I am using PSP 9
Tube of choice, I am using the awesome artwork of Chuchilko
www.picsfordesign.com
This is a PTU tube and you need a license to use it, you can get that @ PFD here
Scrap kit of choice, I am using the awesome Designs By Sarah’s kit Witches Brew
This is a PTU kit and you can get that @ PMTWS here and here
Eye Candy 4000 Gradient Glow (Optional)
Font of choice, I am using font JaneAusten

 Let’s Get Started:
Open up PSP and your supplies, minimize for now, Open up a new image 700*500, we can resize later if needed.

Open up a frame of choice, I am using frame 1 from the kit I have, C/P as new layer, resize this one @ 80% smartsize twice and sharpen twice.

Open up a paper of choice, I am using paper 2 from the kit I have, C/P as new layer, resize three times @ 80% smartsize, sharpen three times, bring below the frame layer and erase any that hangs over.  Give your frame layer a drop shadow now, V&H-1 Opacity-100 Blur-2 Color-BLK.

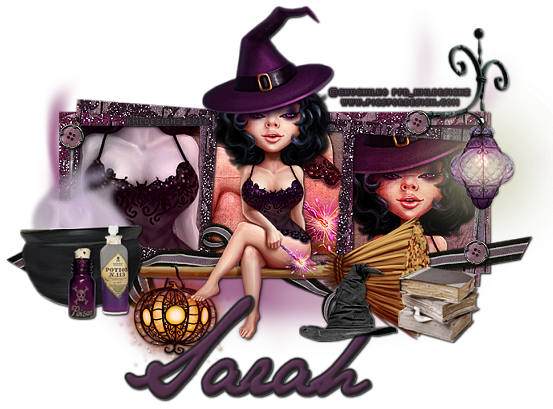
Open up your tube, C/P as new layer, take a different part of the tube and put in the squares of the frame some, resize nicely so they fit nicely in them, sharpen at least twice, same drop shadow, then take the main tube again, C/P as new layer and resize nicely @ 80% smartsize a few times, sharpen at least twice, same drop shadow, I changed the blend mode of the tubes we did in the frame, I changed the one on the left to Luminance Legacy and then hardlight for the other.

 Let’s Decorate The Taggie:

Open up a cauldron of choice, I am using the one in the kit, C/P as new layer, resize this one 5 times @ 80% smartsize and sharpen twice, add same drop shadow, I placed this on the left side of the tag on the bottom.

Open up a stack of books of choice, I am using the one in the kit I have, C/P as new layer, resize this one @ 80% smartsize 8 times and sharpen three times, same drop shadow as before. I placed this on the right bottom side of the tag.

Open up a light lamp of choice, I am using the one in the kit I have, C/P as new layer, resize this @ 80% smartsize 3 times then mirror and sharpen three times, I placed mine at the top right of the tag on the frame some, same drop shadow as before.

Open up a ribbon of choice, I am using ribbon 2 from the kit I have, C/P as new layer, resize this once @ 80% smartsize and sharpen twice, same drop shadow as before, place this below the tube layer, on the bottom of the tag, make sure it’s below all layers but the frame.

Open up a button of choice, I am using button 3 from the kit, C/P as new layer, resize this @ 80% smartsize 8 times and sharpen three times. Same drop shadow as before, I duplicated twice so I had three, place them nicely around the tag, use sample as guide or place as you wish.

Open up 2 potion bottles of choice, I am using 6 and 9 from the kit I have, C/P as new layer for each, resize this @ 80% smartsize 7 times for the smaller one and then 6 times for the bigger one, sharpen three times for each, same drop shadow as before, I placed mine near the cauldron.

Open up a witch’s hat of choice, I am using the one in the kit, C/P as new layer, resize this @ 80% smartsize 5 times and sharpen 4 times, same drop shadow as before, I placed this near the book pile some above most of the layers.

Open up a smoke cloud of choice, I am using the witch’s smoke in the kit, C/P as new layer and bring behind all layers.

Open up your font of choice, add your name and any gradient glow you want, as well as any copyright info that belongs and save as a png or jpg and you’re done!

Thanks for trying my new tutorial, I hope you liked it.

Sunday, October 9, 2011

Halloween Sweet Treats Tutorial


Halloween Sweet Treats Tutorial
October 9th 2011
By: KMLDesignz

Supplies Needed:
PSP, any version should work, I am using PSP 9
Tube of choice, I am using the artwork of Elias Chatzoudis
www.Elias-design.gr
This is a PTU tube and you need a license to use, you can purchase @ PTE here
Scrap kit of choice, I am using Designs By Sarah Sweetest Halloween kit
http://pimpmytagswithscraps.com/blog/
This is a PTU kit and you can purchase @ PMTWS here and here
Eye Candy 4000 Gradient Glow (Optional)
Font of choice, I am using is La Carte

Let’s Get Started:
Open up PSP and your supplies, minimize for now

Open up a new image, 700*500, we will resize later if needed.

Open up a frame of choice, I am using frame 10 from the kit I am using, C/P as new layer and resize once @ 65% smartsize and sharpen once, click inside your frame with your magic wand, expand by 5 and open up a paper of choice, I am using paper 5 from the kit I have, C/P as new layer, resize three times @ 85% smartsize and sharpen twice, invert and click delete, then invert again and then select none, bring below the frame layer, add a drop shadow to your frame layer, V&H-1 Opacity-100 Blur-2 Color-BLK

Open up your tube of choice, C/P as new layer, depending on your tube you’re using, resize nicely and sharpen at least twice to fit on the frame. Duplicate your frame and bring one below the tube, on the top frame erase any that covers the tube some. Add the same drop shadow to your tube layer.

Let’s Decorate The Taggie:

Open up a tag/ribbon of choice, I am using the one in the kit, C/P as new layer, resize twice @ 80% smartsize, sharpen twice, same drop shadow, place on the right side of the tag above all layers.

Open up a stitch line of choice, I am using the one in the kit, C/P as new layer, resize twice @ 70% smartsize, sharpen twice, I placed mine above the paper layer, same drop shadow, I duplicated a couple times to place them around the paper like its stitched, erase any that hangs out of the frame.

Open up another frame of choice, a circle one will work best, I am using frame 4 from the kit, C/P as new layer, resize once @ 80% smartsize then once @ 95% smartsize, sharpen twice and place behind all layers. Same drop shadow as before.
Open up a cupcake of choice, I am using cupcake 4 in the kit, C/P as new layer, resize @ 80% smartsize 4 times and sharpen twice, same drop shadow as before, place on the left side of the tag.

Open up a lollipop of choice, I am using 1 and 3 from the kit, C/P as new layer resize 3 times @ 80% smartsize for one, rotate @ 15 degrees to the left, same drop shadow, then repeat for the other one but resize 4 times, and rotate this one to the right. Place both behind the cupcake some.

Open up your font of choice, add your name and any copyright info that belongs and save as a png or jpg and you’re done.
Thank you for trying my new tut, I hope you enjoyed it!
Saturday, October 8, 2011

On Captain Jack's Tide Tutorial


On Captain Jack’s Tide Tutorial
October 8th 2011
By: KMLDesignz

Supplies Needed:

Any PSP version will do, I am using PSP 9
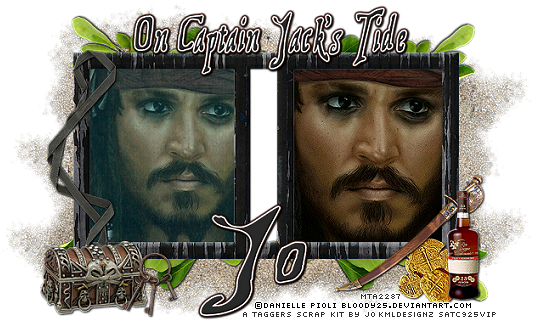
Tube of choice, I am using a FTU tube from © Danielle Pioli, you still NEED a license in order to use it.
www.bloody25.deviant.com
You can purchase that @ MTA here
Scrap kit of choice, I am using On Stranger’s Tide From A Tagger’s Scraps @ SATC
http://itsbacchus.blogspot.com/
This is a PTU kit and you can purchase @ SATC here
Eye Candy 4000 Gradient Glow (Optional)
Font of choice, I am using Treasure Map Deadhand

Let’s Get Started:

Open up PSP and your supplies, minimize them for now, Open a new image 700*500, we will resize later if needed or crop out.

Open up a frame of choice, I am using frame 4 from the kit I am using, C/P as new layer, resize twice @ 65% smartsize, sharpen twice, click inside your frame and expand by 5, open up a paper of choice, I am using paper 19 from the kit I am using, C/P as new layer, resize @ 65% smartsize once then again @ 85% smartsize, sharpen twice and then click invert, delete the extra that hangs, invert again and then select none, bring below the frame layer.

Open up your tube of choice, I am using the one I have, it’s a close up, C/P as new layer, resize twice @ 85% smartsize, sharpen twice and place inside one the frame squares, erase any that hangs over, then C/P again but no resize, fit it nicely inside the other square, erase any that hangs over, sharpen twice. On your first one you did, lower the opacity to 82, add a drop shadow to both tube layers and frame layer as well, V&H-1 Opacity-100 Blur-2 Color-BLK.

Let’s Decorate Your Taggie:

Open up a gold coin pile of choice, I am using the pieces of eight from the kit, C/P as new layer, resize twice @ 65% smartsize, sharpen twice and add the same drop shadow as before, I placed this on the right side of the tag on the bottom.

Open up a knife/sword of choice, I am using the in the kit I have, C/P as new layer, resize twice @ 65% smartsize, sharpen twice, same drop shadow, I mirrored mine so it faced the other, you don’t have to, place this nicely with the coins on the bottom right of the tag.

Open a bottle of rum or any type of bottle you have, I am using the rum bottle from the kit, C/P as new layer, resize this @ 65 twice, sharpen twice and same drop shadow, place this with the knife and coins.
Open up a knotted tie of choice, I am using the black one from the kit, C/P as new layer, resize twice @ 65% smartsize, sharpen twice, same drop shadow as before, I mirrored mine again and then placed on the left side of tag.

Open up a sand scatter of choice, I am using the one in the kit, C/P as new layer, resize once @ 65% smartsize sharpen once, place behind all layers on the bottom, same drop shadow as before just change the opacity to 49% duplicate once and then mirror. I duplicated again twice, and mirrored one, and placed on the top some. Merge these layers together.

Open a leave cluster of choice, I am using leaf 3 from the kit (it’s called greenery) C/P as new layer, I rotated mine 90 degrees to the right, resize twice @ 65% smartsize, sharpen twice and place behind all layers but above the sand, duplicate and mirror to the other size, same drop shadow as before, change the opacity back to 100.

Open up a treasure chest of choice, I am using treasure chest 1 in the kit, C/P as new layer, resize twice @ 60% smartsize, sharpen twice, same drop shadow as before, I placed this on the left bottom of the tag above all layers.

Open up a key ring of choice, I am using the one in the kit, C/P as new layer, resize twice @ 60% smartsize, sharpen twice, same drop shadow as before, place next to the chest.
Open up your font of choice, add your name and any copyright that belongs and save as png or jpg and you’re done.

Thanks for trying my new tutorial, I hope you enjoyed playing with it.

Monday, October 3, 2011

VIP Party Goer Tutorial


VIP Party Goer Tutorial
October 2nd 2011
BY: KMLDesignz

Supplies Needed:
Any PSP version will work, I am using PSP 9
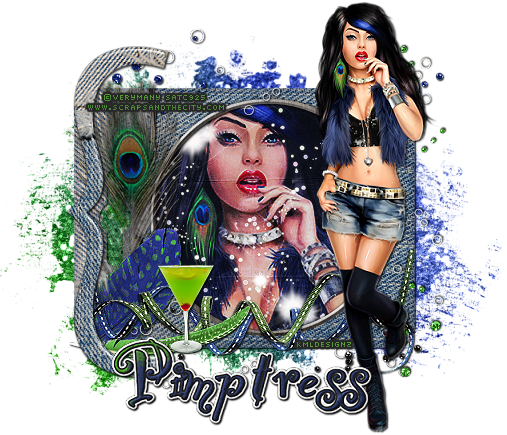
Tube of choice, I am using the AWESOME artwork by Verymany
This is a SATC exclusive tube and you need a license to use it, you can purchase @ SATC here
Scrap kit of choice, I am using the awesome Party Goer Collab by Pimpd Designz and Designs By Sarah @PMTWS
http://pimpmytagswithscraps.com/blog/
 You can purchase this here and here
Eye Candy 4000 Gradient Glow (optional)
Font of choice, I am using Party

Let’s Get Started:
Open up PSP and your supplies, minimize them for now, Open up a new image 700*500, we can resize or crop later if needed.

From your kit, Open up a frame of choice, I am using frame 3 from Sarah’s part, C/P as new layer, resize, I then rotated it 90 degrees to the left, then flip it, resize this @ 60% smartsize once, sharpen twice.

Click inside your frame, expand by 5 and pick out a paper of choice, I am using paper 11 from Sarah’s part of the kit, C/P as new layer, resize this @ 70% smartsize 3 times and sharpen twice, click invert, delete, invert again and then select none. Bring this below the frame layer.

Now with your tube, take the close up of your tube if you have one, if not just use a close up of it without resizing. I had a close up part so I resized mine @ 80% smartsize once and sharpened once. Bring this below the frame layer and above the paper layer, I erased any that hung over the frame. I then took the blend mode and changed it to Hardlight and lowered the opacity to 80%. Add a drop shadow to your tube layer, V&H-1 Opacity-100 Blur-2 Color-BLK.

Now take your full size tube, C/P as new layer, resize this one nicely and fit it nicely on your tag were it looks best. Make sure you sharpen it to look nice and add same drop shadow.

Let’s Decorate Your Taggie:

Sarah's Part of The Kit (Designs By Sarah)

Open up a bracket of choice, I am using the one in Sarah’s part, C/P as new layer, resize this @ 80% smartsize 3 times, sharpen twice and add same drop shadow as before, I mirrored mine and placed on the left side of the tag some.

Open up 2 ribbons of choice, I am using ribbon 7 and 8 from Sarah’s part, C/P one of them first, resize this @ 70% smartsize twice, sharpen twice, and add same drop shadow as before, place near the bottom of the taggie, make sure it’s behind the bracket layer, repeat for the 2nd ribbon but mirror this one after you’re done.

Open up a glitter splat of choice, I am using glitter 1 from Sarah’s part, C/P as new layer, Resize this @ 80% smartsize once, then duplicate and resize again @ 80% smartsize, sharpen both of them twice, place behind all layers, make sure your duplicated one peaks out on the top more.

Open up a feather of choice, I am using the peacock feather from Sarah’s part, C/P as new layer, resize this one @ 80% smartsize 3 times and sharpen twice, same drop shadow as before, I placed this on top of my frame on the left side. Under the bracket layer.

Open up a glitter type spill element, I used 3 of them from Sarah’s part. C/P one of them for now, resize this @ 80% smartsize twice, sharpen twice and place on the bottom of the tag above all layers but the bracket and tube layer. Same drop shadow as before. Repeat this for the remaining two but place one on the top and then flip one and place on the right side of the tag behind the tube layer. You can use the sample as a guide, they are the blue, green and black things with white circles.

Now for Cora’s part of the kit (Pimpd Designz)

Open up 2 more feathers of choice, I am using 2 from Cora’s part, C/P one of them, I am using the blue one first, Resize this @ 80% smartsize twice and sharpen twice, same drop shadow as before, placed this over the peacock feather (or whichever one you used) some so it looks layered. C/P your other feather, this is the green one for me from the kit, resize this one @ 40% smartsize once and then once @ 70% smartsize, sharpen twice, same drop shadow as before. Place this one at the bottom of both the feathers so it looks as if it’s laying there.

Open up a Martini glass, I am using the one in Cora’s part of the kit, C/P as new layer, resize this one @ 40% smartsize twice and sharpen twice, same drop shadow as before. Place this nicely above your feather and ribbon layers.

Open up a sparkle cluster of choice, I am using the sparkle in Cora’s part, C/P as new layer, resize this @ 40% smartsize once, sharpen and no drop shadow, I placed mine over the tube layer we put in the frame. Erase any that covers the face of the tube too much.

Open up your font of choice, add your name and any gradient glow if wanted, also any copyright info that belongs on the tag and save as png or jpg and your done with the tutorial.
Thank you for trying my new tutorial, hope you liked it!!