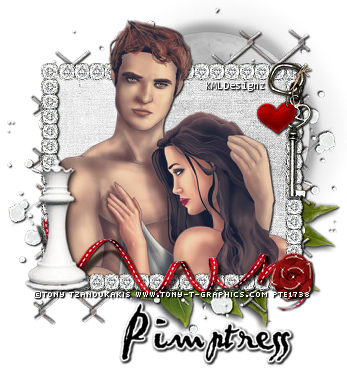
Edward & Bella Forever Tutorial
KMLDesignz March 31rst 2011
Supplies needed
Graphic/Tube of Choice
The one I am using is by:
Tony Tzanoukakis
www.tony-t-graphics.com
You need a PTE license to use it,
you can go here for more info
http://psptubesemporium.com
You can purchase here
Scrap kit of choice
I am using Eclipse By Pimpd Designz, which is PTU
http://pimp-your-tags.blogspot.com/
You can purchase this here
Font of choice, I am using Pablo
Filter Factory J Toners (optional)
Lets get started
Open a new image 600*400 we will resize later
Open up cc-frame-03 from scrap kit, copy and paste as a new layer
Resize this @ 85% smartsize twice, then rotate once @ 90 degrees to the right
Sharpen twice.
Open up your tube/graphic, resize to your liking depending which your using, if using a graphic, once you resize, you will have to click inside your frame layer with the magic wand and then invert and delete the excess. If using a tube, the directions below will help you cover it up.
Duplicate your frame layer and bring one below your tube layer
Erase any that is covering the tube you used, graphics you won't need to.
Sharpen twice, apply clarify to the tube/graphic, once @ 5, this is under enhance photo
Apply the factory filter J toners with these settings twice
Red-10 Green-14 Blue-26
Apply Drop shadow
With your magic wand, click inside your first frame layer, expand by 3
Open up cc-pp-07 and copy and paste as a new layer, resize twice @ 70 smartsize, sharpen once
Bring this below your tube layer, add drop shadow to your duplicate frame layer
V&H-1
Opacity-100
Blur-2.00
Color-BLK
Time to decorate your taggie
Open up cc-ribbon-02, copy and paste as new layer, resize @ 70 smartsize
sharpen once and add same drop as above.
Open up cc-rose, resize three times @ 70 smartsize, sharpen twice, apply
same drop shadow as before. I placed this on the bottom right of the ribbon.
Open up cc-key-charms, resize 3 times @ 70 smartsize, sharpen twice
apply same drop shadow and before, place in top right corner of tag or to your liking.
Open up cc-greens-02, resize twice @ 70% smartsize, sharpen once
Apply same drop shadow as before, place behind all layers in bottom right.
Open up cc-moon, resize once @ 70% smartsize, sharpen once and place behind
all layers, apply same drop shadow as before, I put in top right corner,
place to your liking.
Open up cc-fence, resize @ 70 smartsize once then 90% smartsize, sharpen twice
place behind all layers, duplicate once, flip and mirror, I erased any of it
that overlapped the other one.
Open up cc0glitter-splash, resize @ 70% smartsize twice then 85% smartsize once
sharpen twice, add same drop shadow as before, bring behind grass layer
duplicate once, mirror then flip.
Open up cc-chess-piece, resize @ 70% smartsize twice then 85% smartsize once
sharpen twice, add same drop shadow as before, place in bottom left corner
Choose your font and add your name and any copyright info and save as a png or jpg.
Your done, Hope you enjoyed my tut :)


0 comments:
Post a Comment