skip to main |
skip to sidebar
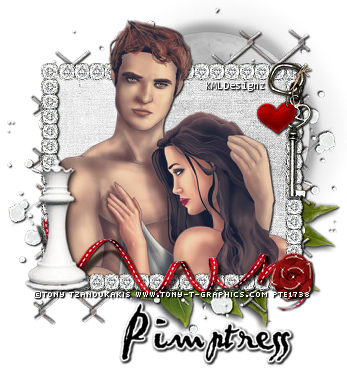
 Edward & Bella Forever Tutorial
KMLDesignz March 31rst 2011
Supplies needed
Graphic/Tube of Choice
The one I am using is by:
Tony Tzanoukakis
www.tony-t-graphics.com
You need a PTE license to use it,
you can go here for more info
http://psptubesemporium.com
You can purchase here
Scrap kit of choice
I am using Eclipse By Pimpd Designz, which is PTU
http://pimp-your-tags.blogspot.com/
You can purchase this here
Font of choice, I am using Pablo
Filter Factory J Toners (optional)
Lets get started
Open a new image 600*400 we will resize later
Open up cc-frame-03 from scrap kit, copy and paste as a new layer
Resize this @ 85% smartsize twice, then rotate once @ 90 degrees to the right
Sharpen twice.
Open up your tube/graphic, resize to your liking depending which your using, if using a graphic, once you resize, you will have to click inside your frame layer with the magic wand and then invert and delete the excess. If using a tube, the directions below will help you cover it up.
Duplicate your frame layer and bring one below your tube layer
Erase any that is covering the tube you used, graphics you won't need to.
Sharpen twice, apply clarify to the tube/graphic, once @ 5, this is under enhance photo
Apply the factory filter J toners with these settings twice
Red-10 Green-14 Blue-26
Apply Drop shadow
With your magic wand, click inside your first frame layer, expand by 3
Open up cc-pp-07 and copy and paste as a new layer, resize twice @ 70 smartsize, sharpen once
Bring this below your tube layer, add drop shadow to your duplicate frame layer
V&H-1
Opacity-100
Blur-2.00
Color-BLK
Time to decorate your taggie
Open up cc-ribbon-02, copy and paste as new layer, resize @ 70 smartsize
sharpen once and add same drop as above.
Open up cc-rose, resize three times @ 70 smartsize, sharpen twice, apply
same drop shadow as before. I placed this on the bottom right of the ribbon.
Open up cc-key-charms, resize 3 times @ 70 smartsize, sharpen twice
apply same drop shadow and before, place in top right corner of tag or to your liking.
Open up cc-greens-02, resize twice @ 70% smartsize, sharpen once
Apply same drop shadow as before, place behind all layers in bottom right.
Open up cc-moon, resize once @ 70% smartsize, sharpen once and place behind
all layers, apply same drop shadow as before, I put in top right corner,
place to your liking.
Open up cc-fence, resize @ 70 smartsize once then 90% smartsize, sharpen twice
place behind all layers, duplicate once, flip and mirror, I erased any of it
that overlapped the other one.
Open up cc0glitter-splash, resize @ 70% smartsize twice then 85% smartsize once
sharpen twice, add same drop shadow as before, bring behind grass layer
duplicate once, mirror then flip.
Open up cc-chess-piece, resize @ 70% smartsize twice then 85% smartsize once
sharpen twice, add same drop shadow as before, place in bottom left corner
Choose your font and add your name and any copyright info and save as a png or jpg.
Your done, Hope you enjoyed my tut :)

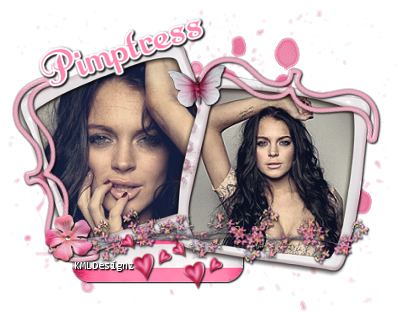
Tickle Me Pink Tutorial
By KMLDesignz
March 19th 2011
Supplies needed
2 Graphics of choice or tubes
Scrap kit Tickled Pink By Pimpd Designz
http://pimp-your-tags.blogspot.com/
You can download that here
Font of choice, I used Anna Nicole NF
Factory filter J toners (optional)
You can get those here
Let's get started
Open a new image 600*400 for room, we resize later
Open up the scrapkit, and lets open the pd-frame-03
Copy and paste as a new layer, resize @ 70% smartsize once then 85%
Sharpen the frame once
With your magic wand, click inside one of the frames, expand by 6
Copy and paste one of your graphics and resize to your liking till
it fits nicely inside your frame. Sharpen twice. Invert then delete
select none and repeat this for the 2nd graphic.
For both of my pics, I did the claify to them under enchance photo
set it to 5.
Now I used the toners plugin with these settings
Red-9 Green-14 Blue-31
Do this once to your photos, now this is optional
Add a drop shadow to your frame layer
V&H-1
Opacity-100
Blur-2.00
Color-BLK
Time To Decorate
Open up the pd-border-01, copy and paste on your image
Resize this once @ 70% smartsize, once @ 85% smartsize and twice @ 95% smartsize
sharpen twice and add the same drop shadow as the frame we did.
Open up the pd-flower-02, copy and paste as a new layer
Resize this 6 times @ 85% smartsize sharpen once and add same drop shadow
Place this in the left bottom corner of the tag, like sample above or to your liking.
Open up pd-bracket-02, Copy and paste as a new layer
Resize this @ 85% smartsize 3 times, rotate it @ 15 degrees to the left
Sharpen once and add the same drop shadow as before
I then duplicated this once and rotated it @ 90 degrees to the left.
Use my tag as the guide to placement or make it your own and place as you wish.
Open up the pd-label-0`, copy and paste as a new layer
Resize this @ 70% smartsize 3 times, flip it and sharpen once
add the same drop shadow as before, and bring this below the frame layer
and place to the left of the tag.
Open the pd-hearts-02, copy and paste as a new layer
Resize this @ 70% smartsize a total of 5 times, sharpen once and duplicate
once and move a little to the right, merge down and add same drop shadow
as before, and place on the tab we just put on the tag.
Open the pd-butterfly, copy and paste as a new layer
Resize this @ 70% smartsize 4 times, sharpen once and add same drop shadow
as before, use tag sample as a guide for placement or were you like.
Open the pd-print-01, copy and paste as a new layer
Resize this @ 70% smartsize twice then 85% smartsize, sharpen once
place this behind all the layers of the tag. Duplicate once and merge together.
Merge together your layers, resize if you like.
Open your font of choice and add your name and any copyright info and
save as a png or jpg.
Your done :) Hope you enjoyed my new tutorial. I love seeing results :)
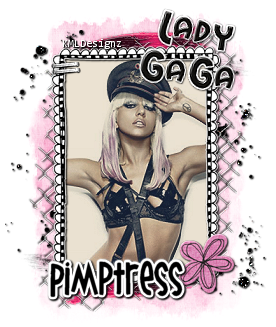
 Emo Cutie Tutorial KMLDesignz Supplies Needed Scrap kit Of choice, I am using PTU Emo Cutie By Pimpd Designz http://pimp-your-tags.blogspot.com/ You can purchase that here and here Font of choice I am using Wish I Were Taller Graphic of choice or tube, which ever you like. Factory J Filter Plugin, you can get here Other supplies here Let's get started. Open up a new image 600*400 we will resize later Open up pd-frame4 or one of your choice, copy and paste as a new layer resize this @ 70% smartsize, I did mine 3 times, sharpen once. Using your magic wand, click inside your frame, expand by 3 copy and paste your graphic of choice, depending on your graphic resize @ 70% smartsize till it fits nicely in your frame. Invert, delete, select none and bring below the frame layer. I then applied the clarify to the pic using 5, this is under enchance photo in PSP. Sharpen image twice. Then I used Factor J filter toners with these settings Red-10 Green-15 Blue-25, I did it twice, play around till you like it. Add a drop shadow to your frame layer V&H-1 Blur-2.00 Opacity-100 Color-BLK Time to decorate your taggie :) Now depending on what kit you use, this will be different but here we go. Open up the pd-glitter-01 and copy and paste as a new layer. I resized this once @ 70% smartsize and sharpened twice, added the same drop shadow as before. Open up the pd-flower-01 and copy and paste as new layer, I resized this 4 times @ 70% smartsize and sharpened twice, and used the same drop shadow as before. Open up pd-fastener-02 and copy and paste as a new layer, resize this 4 times @ 70% smartsize I sharpened 4 times and duplicated once then merged the two together. Duplicate once more and bring it down some so it shows two, use sample as guide. Open up pd-paint-01 and copy and paste as a new layer, resize 4 times, sharpen twice. I placed mine behind all the other layers, duplicated once, flipped it and then mirrored it. Open up pd-paint-02 and do the same as the one we just did. Open up pd-pp-09 and copy and paste as a new layer, resize once @ 85% smartsize Open up the mask in the supplies or one of your choice, apply the mask to the paper. I used the deform tool and dragged my edges in so it fit nicely behind the tag. Open up the wire fence in the supplies, copy and paste as a new layer resize this @ 70% smartsize a few times, sharpen twice and place above the black glitter layer duplicate once and flip it and then mirror, use tag as a guide so it peaks out some. I also used an Alpha set because I used a celebrity in my tag, you can do this as well. Pick out your font of choice, put your name on your tag and any copyright info and save as png or jpg. Your done, hope you enjoyed my new tutorial, I love seeing results ;)


