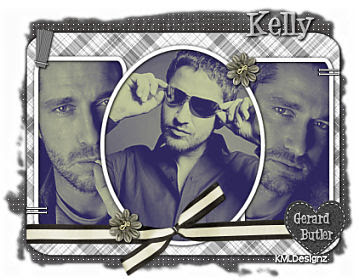
 Scrap Frame Tutorial
Written By: KMLDesignz
October 28th 2008
Supplies Needed
Scrap supplies of choice.
Filter Factory J plugin with toners (optional)
1 paper, some elements, 1 ribbon.
Scrap pieces I used are supplies.
Font of choice.
3 Images of Choice, Bigger the better.
Mask supplied
Template 20 from Cheri's bloghttp://WildCreationz.blogspot.com
Supplies Here
Let's Get Started
Open up the supplies given and minimize them for now, take the template and open up that, duplicate it and close out the original, we won't need it anymore.
Delete the watermark layer, Close off the background layer, Delete the light grey squares as we won't need them. Hide the dark square layer.
Hide both left and right rectangles. Use your magic want and click inside the circle frame.
Expand by 9
Take your first graphic of choice and copy and paste as a new layer, resize this down some, so it fits nice in the circle frame, Sharpen using the unsharpen mask with these settings
Radius- 1.00 Strength- 64 Clipping- 4.00
Do atleast twice or which ever looks best for your graphic.
Select invert, then delete and invert again. Bring this layer below your circle frame.
For mine I did the filter factory J plugin with toners with these settings
Red- 16 Green- 14 Blue- 44
I did this 3 times for mine, do this to your liking.
Repeat these steps for the following 2 graphics left for the right and left rectangles.
Give each of the frames a drop shadow with these settings
V&H- 1 Opacity-100 Blur- 3.00 Color- BLK
Merge visble the frames and graphics together.
I resized mine @ 70% smartsize and used the same sharpen settings as before.
Open back up the dark gray square and resize this @ 70% smartsize too.
Open up the paper in the supplies or one of your choice. If using the one I supplied
I colored this to match my tag, you can do the same.
Take your magic wand and click inside the dark gray square, you might need to close out the frames so its fully selected for the square or easier way, click the square layer, select all, float, defloat, copy and paste the paper your using, I sharpened mine once with the same settings as before, you don't have to do this if you don't want to, invert, delete then invert again. Select none.
Add the same drop shadow to this layer but repeat with -1 for the V&H
You can now delete off the dark gray square, we don't need it anymore.
Open back up your merged frame layers.
Time to decorate the tag.
In the supplies, open up the heart layer, copy and paste on your image, I colored it to match my tag, you can leave it as is if you like. I resized this @ 35% smartsize once and used the same sharpen settings as before, place this in the bottom right corner of the tag, look at my sample for placement. Or you can place were you like.
Open up the ribbon I supplied or one of your choice, paste as a new layer on your image. If your using your own, resize to your liking but make sure it fits nicely on the tag like mine above. If your using the one I supplied, resize this @ 15% once, then 75% once, then 85% once, use the same sharpen as before, I colored it to match my tag. You can do the same or leave as is.
Bring this layer below the heart layer but above everything else.
Give this a drop shadow with these settings
V&H- 1 Opacity-100 Blur-3.00 Color- BLK
Take the star layer and paste that onto your image, I resized mine @ 50% smartsize once and colored it to match, You can do this to your liking. Then give it the same drop shadow as the ribbon.
I duplicated this a couple times and placed them in different spots on the tag, look at sample for placement or you can opt out for this part and leave just one on the other end of the ribbon.
Take the notebook paper layer and paste as a new layer on your image.
Resize this @ 50% smartsize once, give it the same drop shadow as before. Duplicate this one, mirror then flip it so its on the other side peeking out, look at sample for placement. Any of the paper peeking out on top just move it down some so the its not showing.
Take the same notebook paper from the supplies and paste as a new layer again, this resize it @ 70% once and add the same drop shadow, rotate this @ 90 to the left and make it peek out some on the bottom of the tag, then duplicate once and flip it so its peeking some out of the top of the tag. Bring all these layers below the frame layer but above the square layer.
You can merge them together so they don't move when adding more supplies. Just make sure its ONLY the notebook papers merged together.
Take the splat layer in the supplies and paste as a new layer, I colored mine to match, you can do the same or leave as is, Resize this @ 65% smartsize once, use same sharpen settings as before and give it the same drop shadow.
I duplicated this so its on the other side, look at sample for placement. I mirrored it once, then flipped it, then mirror again, then flip. and placed it on the top right corner and one in the bottom left corner. Make sure these layers are above the notebook paper but behind the other elements and above the square.
Take the diamond layer and paste as a new layer, I colored mine again to match, you can leave as is or do the same. Resize this layer @ 70% smartsize once, sharpen with same settings as before, I mirrored it then flipped it and placed on the left side, duplicate and mirror so one is on the right side as well, give it the same drop shadow as before. Make sure this layer is above the splats.
Now for this step its pretty easy.
The background layer is white, click on this layer and flood fill this with a color that goes with your tag, Take the mask I provided and apply to this layer. Delete mask raster, then merge group. Resize this layer @ 85% smartsize once, sharpen as before. Then go to effects, texture effects and find texture. Apply the texture named canvas coarse with these settings
Size-26% Shininess-0 Depth- 1 Ambience-0 Smoothness-0 Angle-315 Intensity-50
Elevation-30 Color- white. Apply this once.
Add an inner bevel with these settings
Bevel #2 Width-10 Smoothness-2 Depth-1 Ambience-5 Shininess-10 Angel-315
Intensity-62 Elevation-30 Color- #c0c0ff
Apply this once.
Go back to effects, Texture effects, then weave and use these settings
Gap Size- 1 Width-4 Opacity-10 Both colors-white Fill gaps Checked.
Apply this one.
Give it the same drop shadow as before.
Merge all layers expect the layer with your mask on it.
I resized this layer @ 75% smartsize once and used the same sharpen as before, Then repeat resizing your mask layer.
Now for this next step its only if you used a celebrity or you can add a word to it if its non celeb.
On top of the heart, type out the celeb name or word your going to use, look at sample for size.
Go to effects, then 3D effects and click on cut out and use these settings
Offset V&H-2 Shadow Color- white Opacity-90 Blur-15.00 Fill NOT checked.
Apply once.
Add drop shadow as before. Then duplicate this layer 3 times, then merge those together and it looks like its cut out of the heart :)
Add anything else you might like.
Add your name to the tag and any copyright/watermark info and save.
Hope you enjoyed the tutorial.
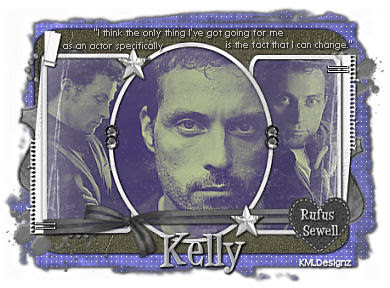
Other samples of this tutorial :)


1 comments:
I can't wait to try this one. Thanks so much for posting it. It's great!
Post a Comment